
Make A Slider With FlexSlider – Part 1
Building a responsive slider with FlexSlider is a very straight forward process, they even provide clear examples on their website for different configurations and styles.
In this tutorial, I will explain how to use the JavaScript of FlexSlider combined with animate.css and ACF Pro to produce a lightweight and visually interesting slider without the need for additional WordPress plugins.
ACF Pro is a premium plugin, for one site usage the cost would be $25 AUD or $100 AUD for a developer license with unlimited site activations (these prices were accurate at the time of writing). ACF is a very powerful solution for building WordPress websites, and I would highly recommend its use generally and not only for this tutorial.
It should be also noted, that this method could be slightly more limiting in terms of different visual styles when compared to Revolution Slider’s “drag and drop” approach, but can be expanded by adding new classes and animations if required. In my opinion, it’s actually better to limit the styles of the slides to at least being similar as to keep the users focus in one common place – general opinion on this might differ I’m sure.
Firstly, install and activate ACF Pro. You can find out more on their website. Once installed, we can move on to adding the fields required for the slider.
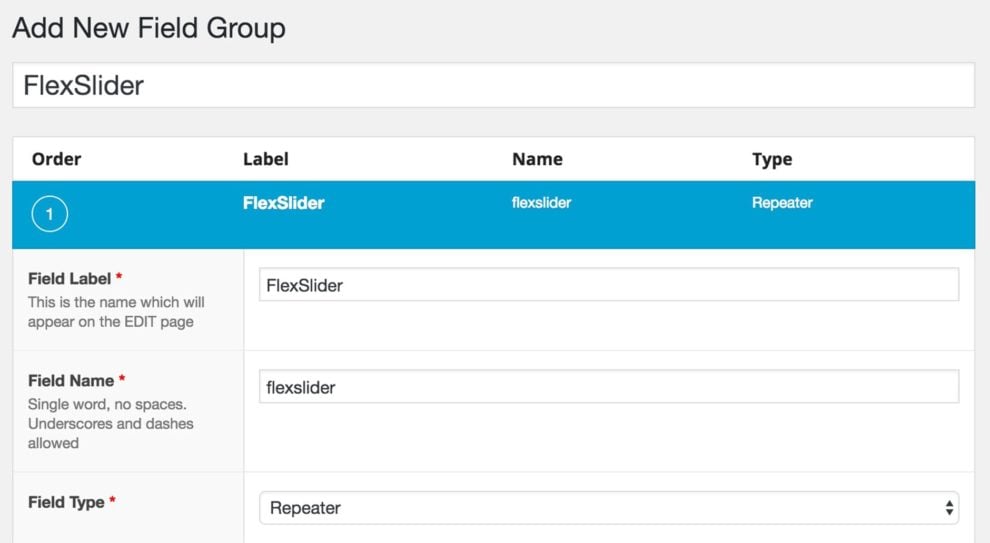
In WP Admin, click Custom Fields on the left and the Add New at the top. Give the new field a name, FlexSlider will be fine if you can not think of anything.
Next, click Add Field to create a new section, then enter a name, again FlexSlider will be fine, the field label should auto-populate in lowercase, just leave this as it is.
You can now select the Field Type, in this case we are going to use Repeater.
Now the fields can be added. Under Sub Fields, click Add Field and add the following (the Field Name will auto populate from the Field Label, just leave as default);
Field Label: Image
Field Type: Image
Return Value: Image ID

Field Label: Title
Field Type: Textarea
New Lines: Automatically add <br>

Field Label: Subtitle
Field Type: Textarea
New Lines: Automatically add <br>

Field Label: Button
Field Type: Text

Field Label: URL
Field Type: Url
With the fields created, we can now set some basic visual configuration. Below the fields, set the following (these are my preferences, you can of course set this how you like);
Layout: Block

Button Label: Add Slide
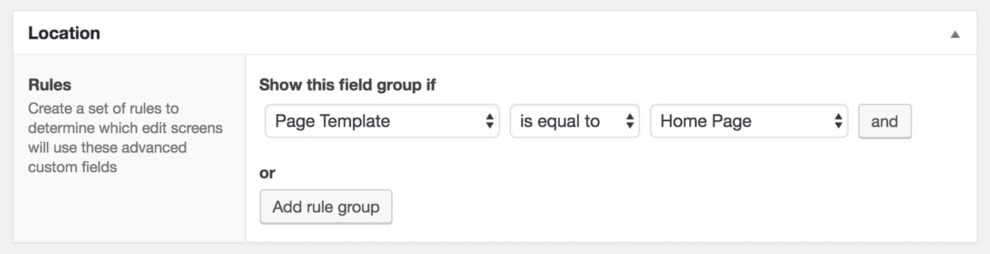
Next we need to set where this custom field should appear. I’m going to set this to the front page only (this is assuming you have a template called Home Page, you may need to set this differently in your theme).
Click Publish in the top right hand corner once all these steps are complete.
You will now have a repeater on the desired page where you can add your FlexSlider information, I will skip filling this in as it is self explanatory (please do let me know if you have any issues).
Part 2 of this tutorial will be available soon.